Manually Setting the Paging File (Virtual Memory)
")
When your system runs out of physical RAM, it uses a reserved portion of the disk called the paging file (or virtual memory). By default, Windows manages this size dynamically — but on a system dedicated to gaming with GameLoop, a poorly configured or undersized paging file can lead to:
Application crashes
FPS dips during memory spikes
General system instability
In this guide, we’ll manually set a fixed paging file size to ensure consistent performance and prevent sudden slowdowns.
Step-by-Step: Set Paging File Manually in Windows 10
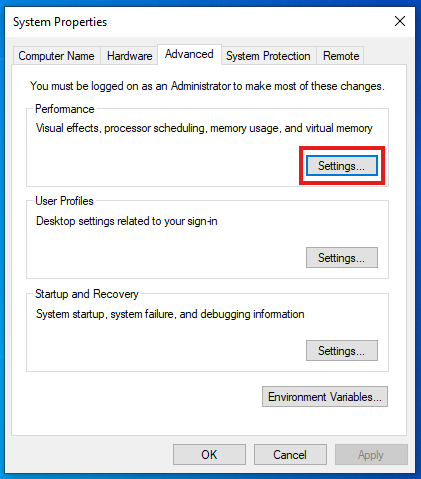
📍 Step 1: Open Virtual Memory Settings
Press
Win + R, typesysdm.cpl, and hit EnterGo to the Advanced tab
Under Performance, click Settings
📍 Step 2: Disable Automatic Management
In the Performance Options window, go to the Advanced tab
Click Change under Virtual Memory
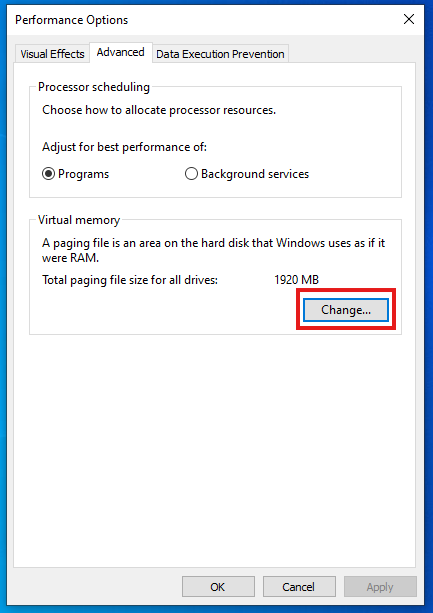
Uncheck:
Automatically manage paging file size for all drives
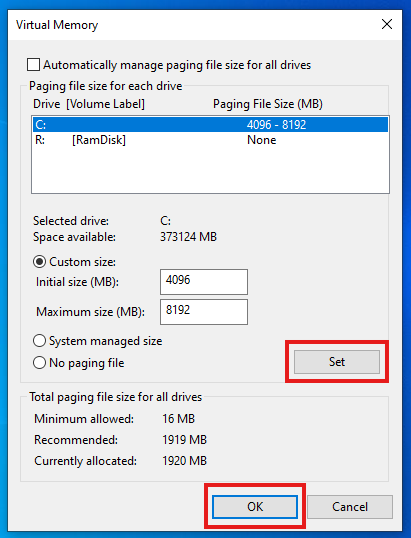
📍 Step 3: Select the System Drive
Select the drive where Windows is installed (typically
C:)
📍 Step 4: Set a Custom Size
Use a fixed size to avoid runtime resizing delays:
| RAM Size | Initial / Maximum Size |
|---|---|
| 8 GB | 1024 MB / 4096 MB |
| 16 GB | 2048 MB / 8192 MB |
| 32 GB or more | 4096 MB / 8192+ MB |
Enter these numbers in Initial size (MB) and Maximum size (MB) fields
Click Set → OK
📍 Step 5: Restart Your Computer
Changes will take effect after reboot.
Why This Helps
Manually allocating virtual memory prevents Windows from resizing the paging file on the fly, which can lead to input lag, stuttering, or freezing — especially while running GameLoop with limited RAM.
⚠️ Best Practices
Don’t disable the paging file entirely, even with large RAM
Always use fixed size — dynamic sizing adds unnecessary overhead
Place it on the fastest drive available (preferably SSD)