Download Windows 10 Pro 21H2 & Create a Bootable USB for GameLoop (Step-by-Step Guide)
")
To achieve maximum performance, stability, and compatibility with GameLoop, we strongly recommend installing Windows 10 Pro 21H2 (Build 19044.1288) — a clean, lightweight version free from the bloated security layers and background services introduced in newer builds like 22H2.
⚠️ Why Not the Latest Version?
Newer builds such as 22H2 and beyond introduce features like:
Virtualization-Based Security (VBS)
Smart App Control
Heavy Background Telemetry
These features may benefit enterprise environments but significantly reduce FPS and introduce latency in performance-critical applications like emulators.
Since Microsoft no longer provides direct access to 21H2 ISO files, we’ve listed two verified and safe sources below.
PART 1: Download the Correct ISO
Use one of the following links to download the English version of Windows 10 Pro 21H2 (x64):
📥 Mirror 1 – Archive.org
Download from Archive.org📥 Mirror 2 – Google Drive (Hosted by Us)
Download from Google Drive
🌍 Only the English version is provided.
If you need another language (e.g., Turkish, German, Spanish), language packs can be installed manually after setup.Save the ISO file to your computer.
💡 File size: approx. 4.3 GBMake sure the filename resembles:
Windows_10_21H2.iso
PART 2: Create a Bootable USB with Rufus
🛠 Requirements:
A USB drive (min 8 GB, USB 3.0 recommended)
Rufus (free & portable)
🔧 Step-by-Step Guide
📍 Step 1: Download and Open Rufus
Visit rufus.ie
Download the portable version
Launch
Rufus.exe
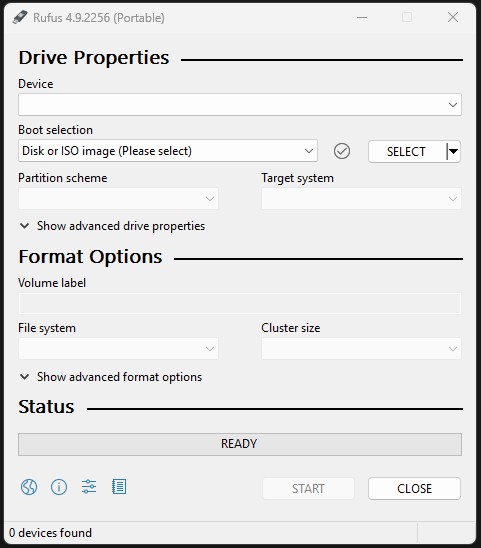
Rufus Home
📍 Step 2: Plug in Your USB Drive
Insert your USB drive
In Device, select the USB from the list
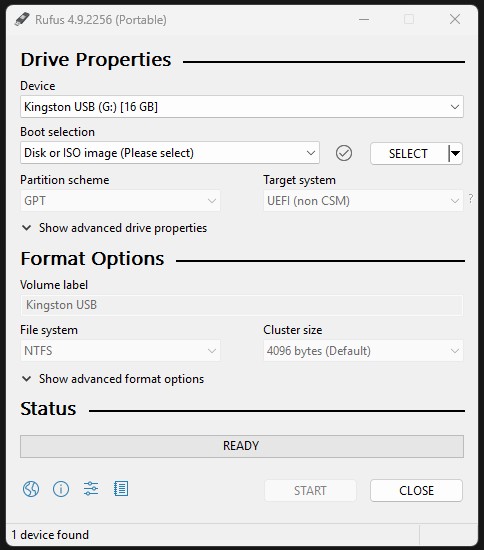
Rufus USB Selected
📍 Step 3: Load the ISO
Click SELECT under “Boot selection”
Locate and choose
Windows_10_21H2.iso
📍 Step 4: Configure Settings
| Option | Value |
|---|---|
| Partition scheme: | GPT (for UEFI) |
| Target system: | UEFI (non-CSM) |
| File system: | NTFS or FAT32 |
| Cluster size: | Default |

Rufus USB Configured
📍 Step 5: Start the Process
Click Start
Accept any warnings (all USB contents will be erased)
Wait 5–10 minutes

Rufus Erase Warning
“Tamam” means OK :)
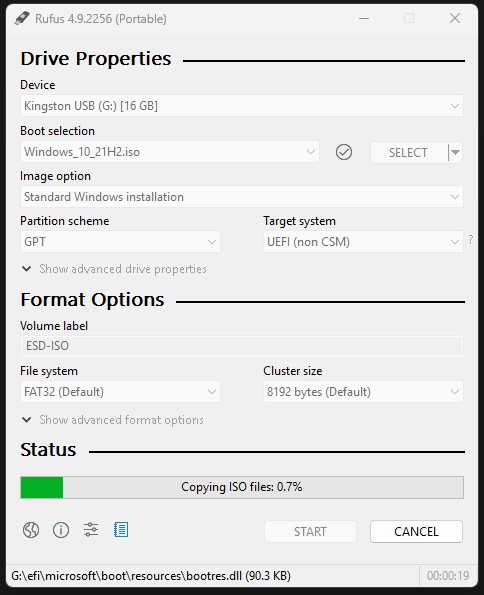
Rufus Progress Bar
✅ Done!
Once complete, you’ll see “READY” at the bottom of the Rufus window. Your USB stick is now ready to install Windows 10.
⚠️ Final Notes
Don’t remove the USB yet — you’ll need it to boot into Windows setup.
Disable Secure Boot in BIOS before proceeding.
Avoid connecting to the internet during installation. (We explain why in the Installation step.)


[…] ✅ A bootable USB created with the Windows 10 21H2 ISO (see Guide) […]