Disable Windows Firewall Permanently

Windows Firewall continues to run in the background even after other security services are disabled. To completely eliminate background interference and unnecessary logging, we will permanently disable the Windows Defender Firewall using the Services panel and the Registry.
⚠️ Important Warning
Disabling all security services, including Firewall, makes your system completely vulnerable to external threats.
👉 Do not browse the internet, install third-party software, or use this system for anything other than GameLoop.
Step-by-Step: Disable Windows Defender Firewall
📍 Step 1: Turn Off from Control Panel (Temporary)
Press
Win + R, typecontrol, and press EnterGo to: System and Security → Windows Defender Firewall
In the sidebar, click Turn Windows Defender Firewall on or off
Select both options:
Turn off Windows Defender Firewall (private network)
Turn off Windows Defender Firewall (public network)
Click OK
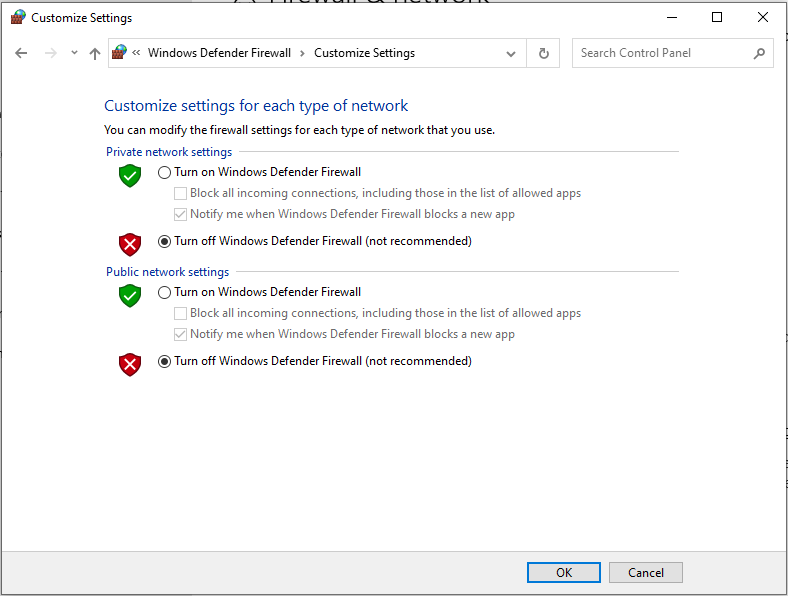
⚠️ This only disables the firewall temporarily. We’ll now make it permanent.
📍 Step 2: Disable Firewall Service via services.msc
Press
Win + R, typeservices.msc, and press EnterScroll down and locate Windows Defender Firewall
Right-click → Properties
Under Startup type, select
DisabledClick Stop if the service is running
Click Apply → OK
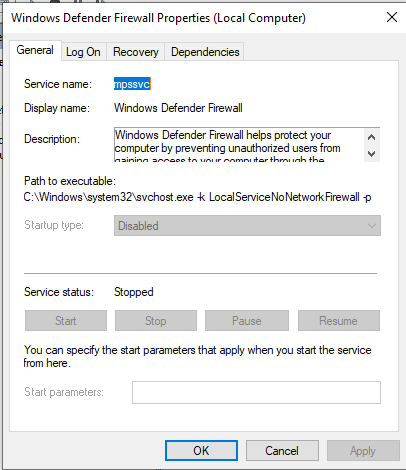
💡 Note:
If all buttons are greyed out (Start, Stop, etc.), that means the service is already non-operational. In that case, applying Step 3 will be sufficient to fully disable Windows Firewall.
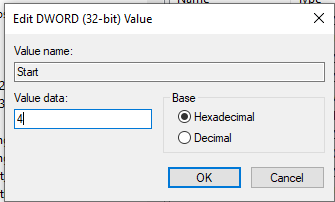
📍 Step 3: Block Firewall from Restarting via Registry (Optional but Recommended)
Press
Win + R, typeregedit, and press EnterNavigate to:
In the right pane, double-click
StartChange the value to
4Click OK and close Registry Editor
✅ Done!
Windows Firewall is now completely disabled and will not restart, even after reboot.
🔐 Final Reminder
This system is no longer protected by any built-in security mechanisms.
Do not use it for anything other than GameLoop.
Stay offline unless absolutely necessary.